Phone:
(701)814-6992
Physical address:
6296 Donnelly Plaza
Ratkeville, Bahamas.

Phone:
(701)814-6992
Physical address:
6296 Donnelly Plaza
Ratkeville, Bahamas.
A bathroom renovation doesn’t have to start from scratch. If you’re looking to refresh your space without a full gut-job, upgrading your sink vanity cabinet is one of the smartest moves you can make. A quality bathroom vanity cabinet and sink combination not only improves functionality but instantly changes how your entire bathroom feels. Whether you’re dealing with cramped storage, outdated finishes, or plumbing that’s seen better days, a new bath sink vanity solves multiple problems at once. This guide walks you through everything you need to know to choose, buy, and install the right sink vanity cabinet for your home.
A sink vanity cabinet is a freestanding or wall-mounted unit that combines storage, a countertop, and basin connectivity in one piece. It’s the furniture-like structure that sits beneath your bathroom sink, usually with drawers or cabinet doors for storing toiletries, medications, and cleaning supplies. Unlike a simple pedestal sink (which offers zero storage) or a basic cabinet, a vanity blends form and function, it holds your plumbing while giving you actual room to stash things.
The basic anatomy: a cabinet box (typically made from plywood, MDF, or solid wood), a countertop surface (ceramic, granite, quartz, or laminate), and a sink basin mounted or integrated into that top. The cabinet sits on a base (either legs or a recessed toe-kick) and houses the supply lines, drain, and often a P-trap underneath. Some vanities come pre-assembled with the sink already mounted: others arrive as components you piece together on-site.
Before you shop, measure three things: the wall space where your vanity will sit, the water supply and drain locations, and your ceiling height if you’re considering a tall cabinet. Standard vanity widths run 24, 30, 36, 48, and 60 inches, but measure your actual wall, not assumptions. Account for doors, windows, and toilet placement. Most bathrooms can accommodate a 36-inch vanity comfortably: smaller powder rooms work with 24-inch units.
Measure from the wall to any obstructions (toilet, shower door hinge) and note the rough-in height where your drain and supply lines exit the wall, typically 18–20 inches from the floor. Mark the horizontal distance between the center of the drain and center of the supply line: most vanities have pre-drilled holes, but knowing your exact spacing prevents headaches during installation. Take photos and note wall condition (drywall damage, loose tile, water stains) so you know what prep work lies ahead.
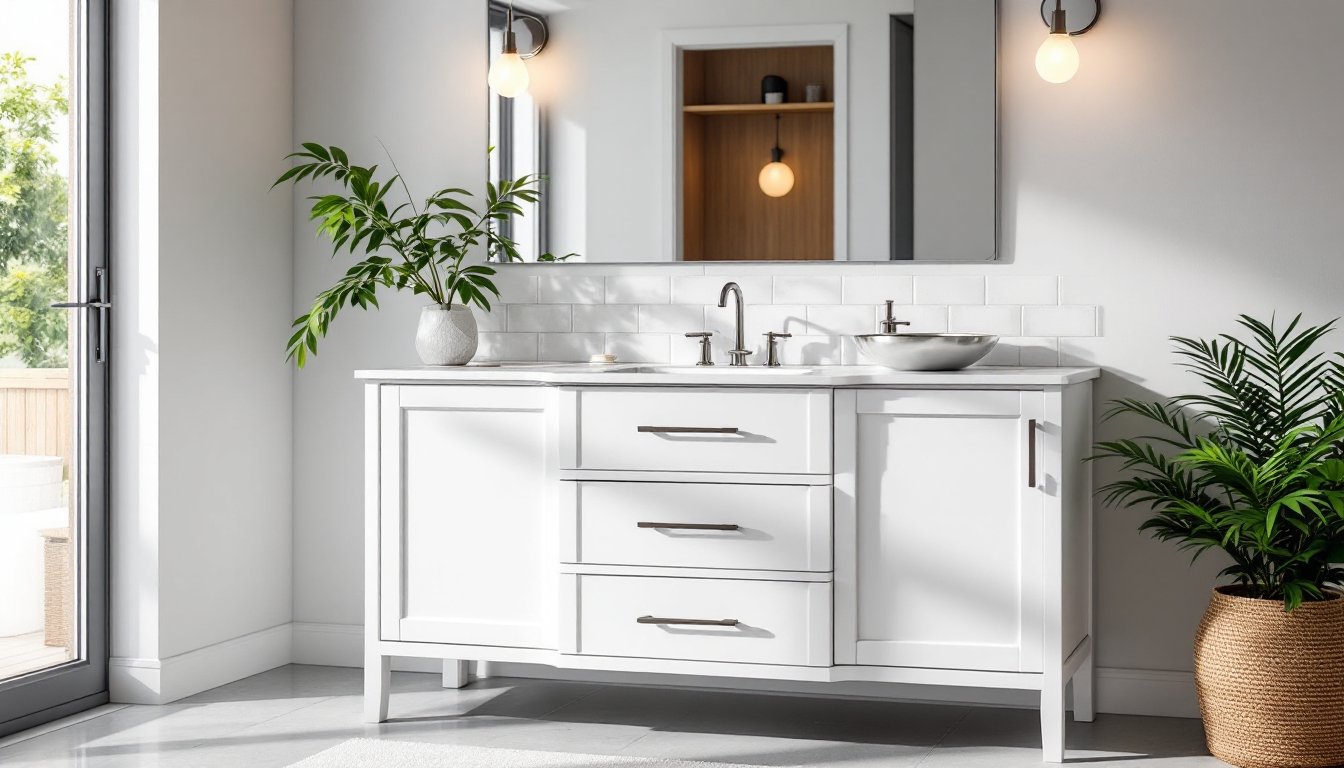
Modern farmhouse remains the dominant style for bathroom vanity cabinets, white or natural wood finishes, simple hardware, and shaker-style doors appeal to most homeowners. Industrial looks (steel frames, open shelving) work for smaller spaces. Transitional vanities blend traditional cabinetry with clean lines and pair well with various tile and lighting choices.
Dark finishes (espresso, charcoal, black) add drama and hide water spots better than white, though they show dust and require more frequent wiping. Light finishes feel airy in cramped bathrooms but demand regular cleaning. Gray tones split the difference and pair with nearly any decor scheme. The best style is one you won’t tire of in 5–7 years. If you’re renting or plan to move soon, neutral finishes (white, light gray, natural oak) hold resale appeal better than statement colors.
Storage layout matters more than you’d think. Double vanities work best for couples: single units suit solo bathrooms or powder rooms. Drawers (with soft-close hinges, ideally) beat cabinet doors for accessing everyday items without bending. Shelving inside the cabinet accommodates odd-shaped bottles and cleaning supplies.
Countertop material affects durability and maintenance. Ceramic or porcelain tops are affordable and easy to clean but chip if you drop a heavy tool. Laminate is budget-friendly but won’t last 20 years in a humid bathroom. Quartz and granite look premium, resist stains, and last decades, costs run $800–2,500 for a complete unit. According to design research, quartz has become the most popular choice for modern bathroom renovations because it combines durability with minimal upkeep.
Pre-assembled vs. knock-down construction: Pre-assembled units arrive ready to install (less work, fewer failure points), but shipping costs more and they’re harder to maneuver through tight doorways. Knock-down vanities require assembly on-site but fit through doorways more easily.
Sink type comes in three flavors: drop-in (rim sits on the countertop), undermount (secured from below, cleaner look, pricier), and vessel (bowl perches on top). Drop-in sinks are easiest for DIY installation: undermount requires a router or careful hole drilling. Consider faucet mounting, single-hole, widespread, or wall-mounted, before buying. Some vanities include the faucet and drain assembly: others require you to source these separately, adding cost and complexity.
Before you begin, shut off the water supply at the main or fixture shutoff valve, have towels ready for spillage, and clear the area below your sink. Remove the old vanity by turning off water, disconnecting the supply lines (have a bucket handy), loosening the drain nuts, and unscrewing any mounting brackets or fasteners holding it to the wall studs. If it’s bolted down hard, rock it gently side-to-side rather than pulling straight out, you don’t want to crack the basin or damage wall framing.
Check the wall for damage or mold once the old unit is out. If you see soft drywall, water stains, or mildew, repair and seal it before installing the new vanity. A moisture barrier or waterproofing primer prevents future rot. Scribe the base of your new vanity to any unevenness in the floor using a compass or coping saw, this keeps gaps minimal and prevents rocking.
Installation steps:
If your rough-in doesn’t match the vanity’s pre-drilled holes, stop and call a plumber. Patching misaligned holes creates future leak points. Interior design platforms recommend hiring a pro for plumbing if you’re not comfortable with supply-line connections, water damage costs far more than a plumber’s service call.
A well-maintained sink vanity cabinet lasts 10–20 years depending on material and use. Wipe spills immediately, water pooling on a wood or laminate countertop seeps into seams and causes swelling or mold. Use coasters under bottles and a soap dish or tray for wet items. Avoid leaving wet towels or bath mats draped over the cabinet doors.
Clean with a soft cloth and mild dish soap or a bathroom-specific cleaner: avoid abrasive scouring pads or harsh chemicals that dull finishes or damage wood stain. For quartz or granite tops, use a stone-safe cleaner and reseal annually if the manufacturer specifies. Check supply lines every six months for signs of dripping or corrosion: if you spot water stains under the sink, shut off the water immediately and inspect fittings.
The most common failure point is the drain assembly. Hair and soap buildup eventually clog the trap or corrode metal P-traps. Use a drain screen to catch hair, and pour boiling water down the drain monthly to keep it flowing. If you notice soft or bubbling areas on cabinet sides, you’ve got a slow leak, unscrew the fitting, apply plumber’s tape (also called PTFE tape) to the threads, and reconnect. If the wood itself is soft or moldy, that section needs replacement or the entire unit may fail structurally. Black bathroom storage cabinets or light finishes, whichever you choose, stay attractive longer when you address moisture early.