Phone:
(701)814-6992
Physical address:
6296 Donnelly Plaza
Ratkeville, Bahamas.

Phone:
(701)814-6992
Physical address:
6296 Donnelly Plaza
Ratkeville, Bahamas.
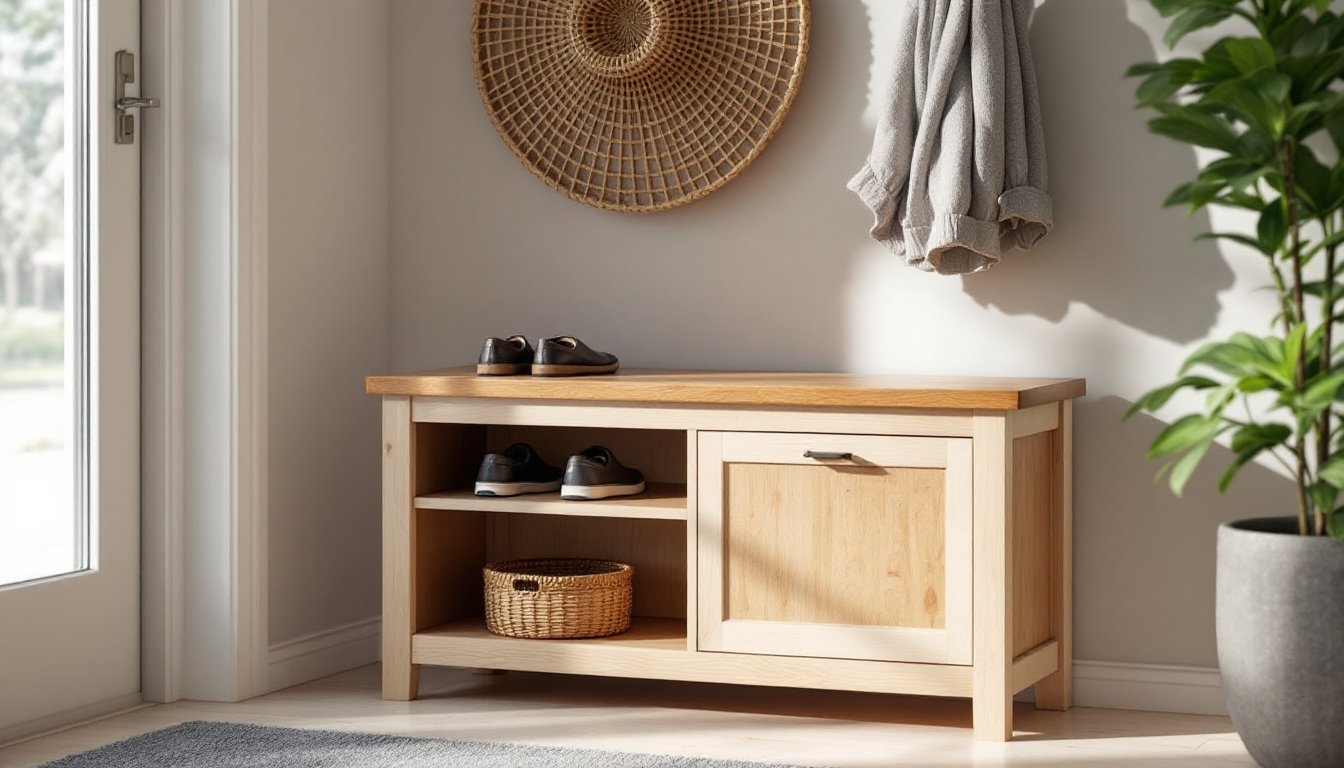
An entryway without proper shoe storage becomes a chaotic tangle of footwear within weeks. Shoes pile by the door, clutter creeps into living spaces, and everyone trips over laces. A DIY shoe storage bench solves this problem while giving you a functional seating spot to tie shoes or change socks. This project combines practical storage with a finished piece that looks intentional, not like a storage hack. Whether you’re working with limited floor space or aiming to create an organized entryway, a shoe storage bench is a manageable weekend build that yields real results in your home’s functionality and appeal.
A shoe storage bench serves double duty: it’s seating and storage rolled into one compact footprint. Unlike wall-mounted shoe racks or freestanding cabinets, a bench doesn’t demand extra floor space, it occupies space while pulling organizational weight. You sit on top while shoes hide below, making the entryway feel less cluttered and more intentional.
The DIY route gives you control over dimensions. Doorways, hallways, and entryways all have different constraints. A store-bought unit might be 36 inches when you need 30, or 18 inches deep when you only have 14 inches to work with. Building your own means the bench fits your space exactly, not the other way around.
Cost matters too. A solid wood shoe storage bench from a furniture retailer runs $300–$800 depending on finish and capacity. A DIY version, built with dimensional lumber and basic hardware, typically costs $80–$150 in materials. You’re paying for your labor and knowledge, not a middleman’s markup.
Finally, a bench that stores shoes looks better than plastic bins or loose racks. It integrates into your entryway design. Paint or stain it to match existing trim or furniture. Add a cushion on top and it becomes a spot where guests naturally sit to untie boots.
• 1×12 pine or cedar boards (2 pieces, 48 inches long for the sides: adjust length to your space)
• 1×10 boards (2 pieces, 36 inches long for the bottom shelf)
• 1×8 boards (1 piece, 48 inches long for the back panel)
• 2×4 lumber (4 pieces, 12 inches long for interior support legs: trim as needed for shelf height)
• Wood screws (2.5-inch and 1.25-inch, exterior-grade if in a humid entryway)
• Wood glue (waterproof, exterior-rated)
• 80-, 120-, and 220-grit sandpaper (for prep and finish)
• Primer and paint or wood stain (interior-rated: test in your space first)
• Felt pads or rubber feet (to protect flooring and reduce sliding)
• Miter saw or circular saw (for crosscutting and angled cuts if desired)
• Power drill with bits (including a countersink bit)
• Speed square and tape measure (for marking and layout)
• Clamps (at least two, 24-inch or larger)
• Orbital or palm sander (optional but speeds surface prep)
• Safety gear: eye protection, work gloves, and a dust mask (wood dust, especially softwoods like pine, irritates lungs and eyes)
A miter saw delivers cleaner crosscuts than a circular saw, but a circular saw works fine if you’re careful with your cut line and clamp the board securely.
Measure your entryway or target space carefully. Bench length determines how many shoes you’ll store: a 36-inch bench holds roughly eight to ten pairs. Standard bench height (seat level) sits around 16–18 inches off the ground, comfortable for sitting and tying shoes.
Cut all your pieces before assembly. If using a miter saw, support the board fully on both sides of the blade to avoid binding. Pine and cedar splinter easily, so wear eye protection and a dust mask. Sand all cut edges with 120-grit sandpaper to smooth splinters.
Lay out your pieces on a flat surface and do a dry fit, assemble without fasteners first. This catches mistakes before you drive screws. Check that corners square up using a speed square, and that the bench sits level on a flat floor. Shim legs if needed: a wobbly bench is dangerous and annoying.
Start with the frame. Attach the interior 2×4 support legs to the side panels using wood glue and 2.5-inch screws. Drill pilot holes and countersink (recess the screw heads slightly below the wood surface) to prevent wood splitting and to hide fasteners. You’ll need two legs per side, one near the front, one near the back.
Once the frame is rigid, attach the bottom shelf (the 1×10 boards) to the support legs. This is where shoes rest. Use 1.25-inch screws driven from underneath the shelf into the leg, or from the leg into the shelf, either works. Make sure the shelf sits level.
Attach the back panel (the 1×8 board) to the rear support legs. This adds stability and prevents the bench from tipping backward if someone leans against it. Use glue and 1.25-inch screws.
For the seat, cut a 1×12 board to length and attach it to the top of the frame with pocket hole screws (if you have a pocket hole jig) or with countersunk screws driven from underneath. The seat should overhang the frame slightly, about an inch on front and sides, for a finished look.
Inspect all joints. Tighten any loose screws and double-check that the bench doesn’t rock. A sturdy bench is a safe bench, especially if kids will sit on it or jump around near it.
Sand the entire bench with 220-grit sandpaper to smooth the surface and prepare it for finish. Wipe down with a tack cloth (a sticky cloth that removes dust) before painting or staining.
If painting, apply primer first, especially if you’re covering pine (which absorbs stain unevenly and can bleed tannins through paint). Interior latex paint works well for entryways: choose a satin finish for easier cleaning. Apply two coats, sanding lightly between coats with 220-grit paper. If staining, follow the stain manufacturer’s dry time before applying polyurethane for protection.
Add felt pads or rubber feet to the bottom of each leg to protect your flooring and allow the bench to slide slightly for access or cleaning. These cost pennies and prevent dings.
For an over-the-toilet storage cabinet look that pairs well with your bench, consider adding a shelf or two on the wall behind it. This extends your storage without eating more floor space and keeps the entryway zone organized. Alternatively, a simple built-in entryway bench with storage design can be expanded to include an over-the-toilet storage cabinet if your bathroom shares the entryway wall.
Store shoes on the lower shelf in their original boxes or in clear plastic bins labeled by type (work shoes, casual, dress). This keeps the bench looking tidy and prevents leather from cracking. For a bathroom or mudroom setup, over-the-toilet storage works well for overflow, and a bathroom storage cabinet above the toilet frees up floor space entirely.
Inspect your bench monthly. Tighten screws if they loosen from use, and wipe down the seat and shelf with a damp cloth. Wood swells and shrinks with humidity changes, especially in humid entryways or bathrooms near doors. If you notice gaps opening, it’s normal, wood moves. A light stain touch-up keeps it looking fresh. Polyurethane resists spills better than bare wood, so reapply every year or two if the finish shows wear.
Resources like Ana White’s woodworking plans offer free shoe bench designs with hidden storage that pair well with Fix This Build That tutorials if you want to expand your skills. For beginners, The Handyman’s Daughter has excellent step-by-step guides for similar projects.
A DIY shoe storage bench is a functional, affordable project that transforms a cluttered entryway into an organized space with character. With basic tools, pocket-friendly materials, and a weekend of work, you’ll have a custom piece that fits your home perfectly. The key is careful measurement, thorough prep work, and taking your time with assembly, rushing leads to wobbly joints and misaligned pieces. Once finished, your bench will serve daily, storing shoes while providing a convenient seat. That’s the real payoff of DIY home improvement: a useful piece you built yourself, tailored to your space.
